I recently had the opportunity to teach a class to a young couple. They had a wonderful goal. That was, to take part in making their own wedding bands from some heirloom gold jewelry that they already had. They first contacted my wife Gail Golden and spoke with her about it. We both decided that this would be a fun class and she would help be technical support.

When Joe and Jamie arrived at the studio we were ready. They had spent the night in Taos and were refreshed. Jamie had some gold from her grandmother that had come from Korea. One of the objects was a 24K heavy curb chain bracelet which was perfect for the project. I had them cut the clasp and security chain off the bracelet and check to make sure that all the old solder that was used was removed. We calculated what gold we had and I got out my book of recipes. We carefully calculated what other alloys were to be used to make the 18K red gold they wanted. We had three recipes to pick from and picked one that had only copper as the other alloy. After careful weighing and measuring we put the gold in a crucible and heated the metals and mixed them together and cast them into a bar ingot. First step complete! This was where the magic started! I love mixing my own alloys so I know exactly what is in it. I love the alchemy aspect and love watching one alloy melt into another and mix to a most luscious color gold.
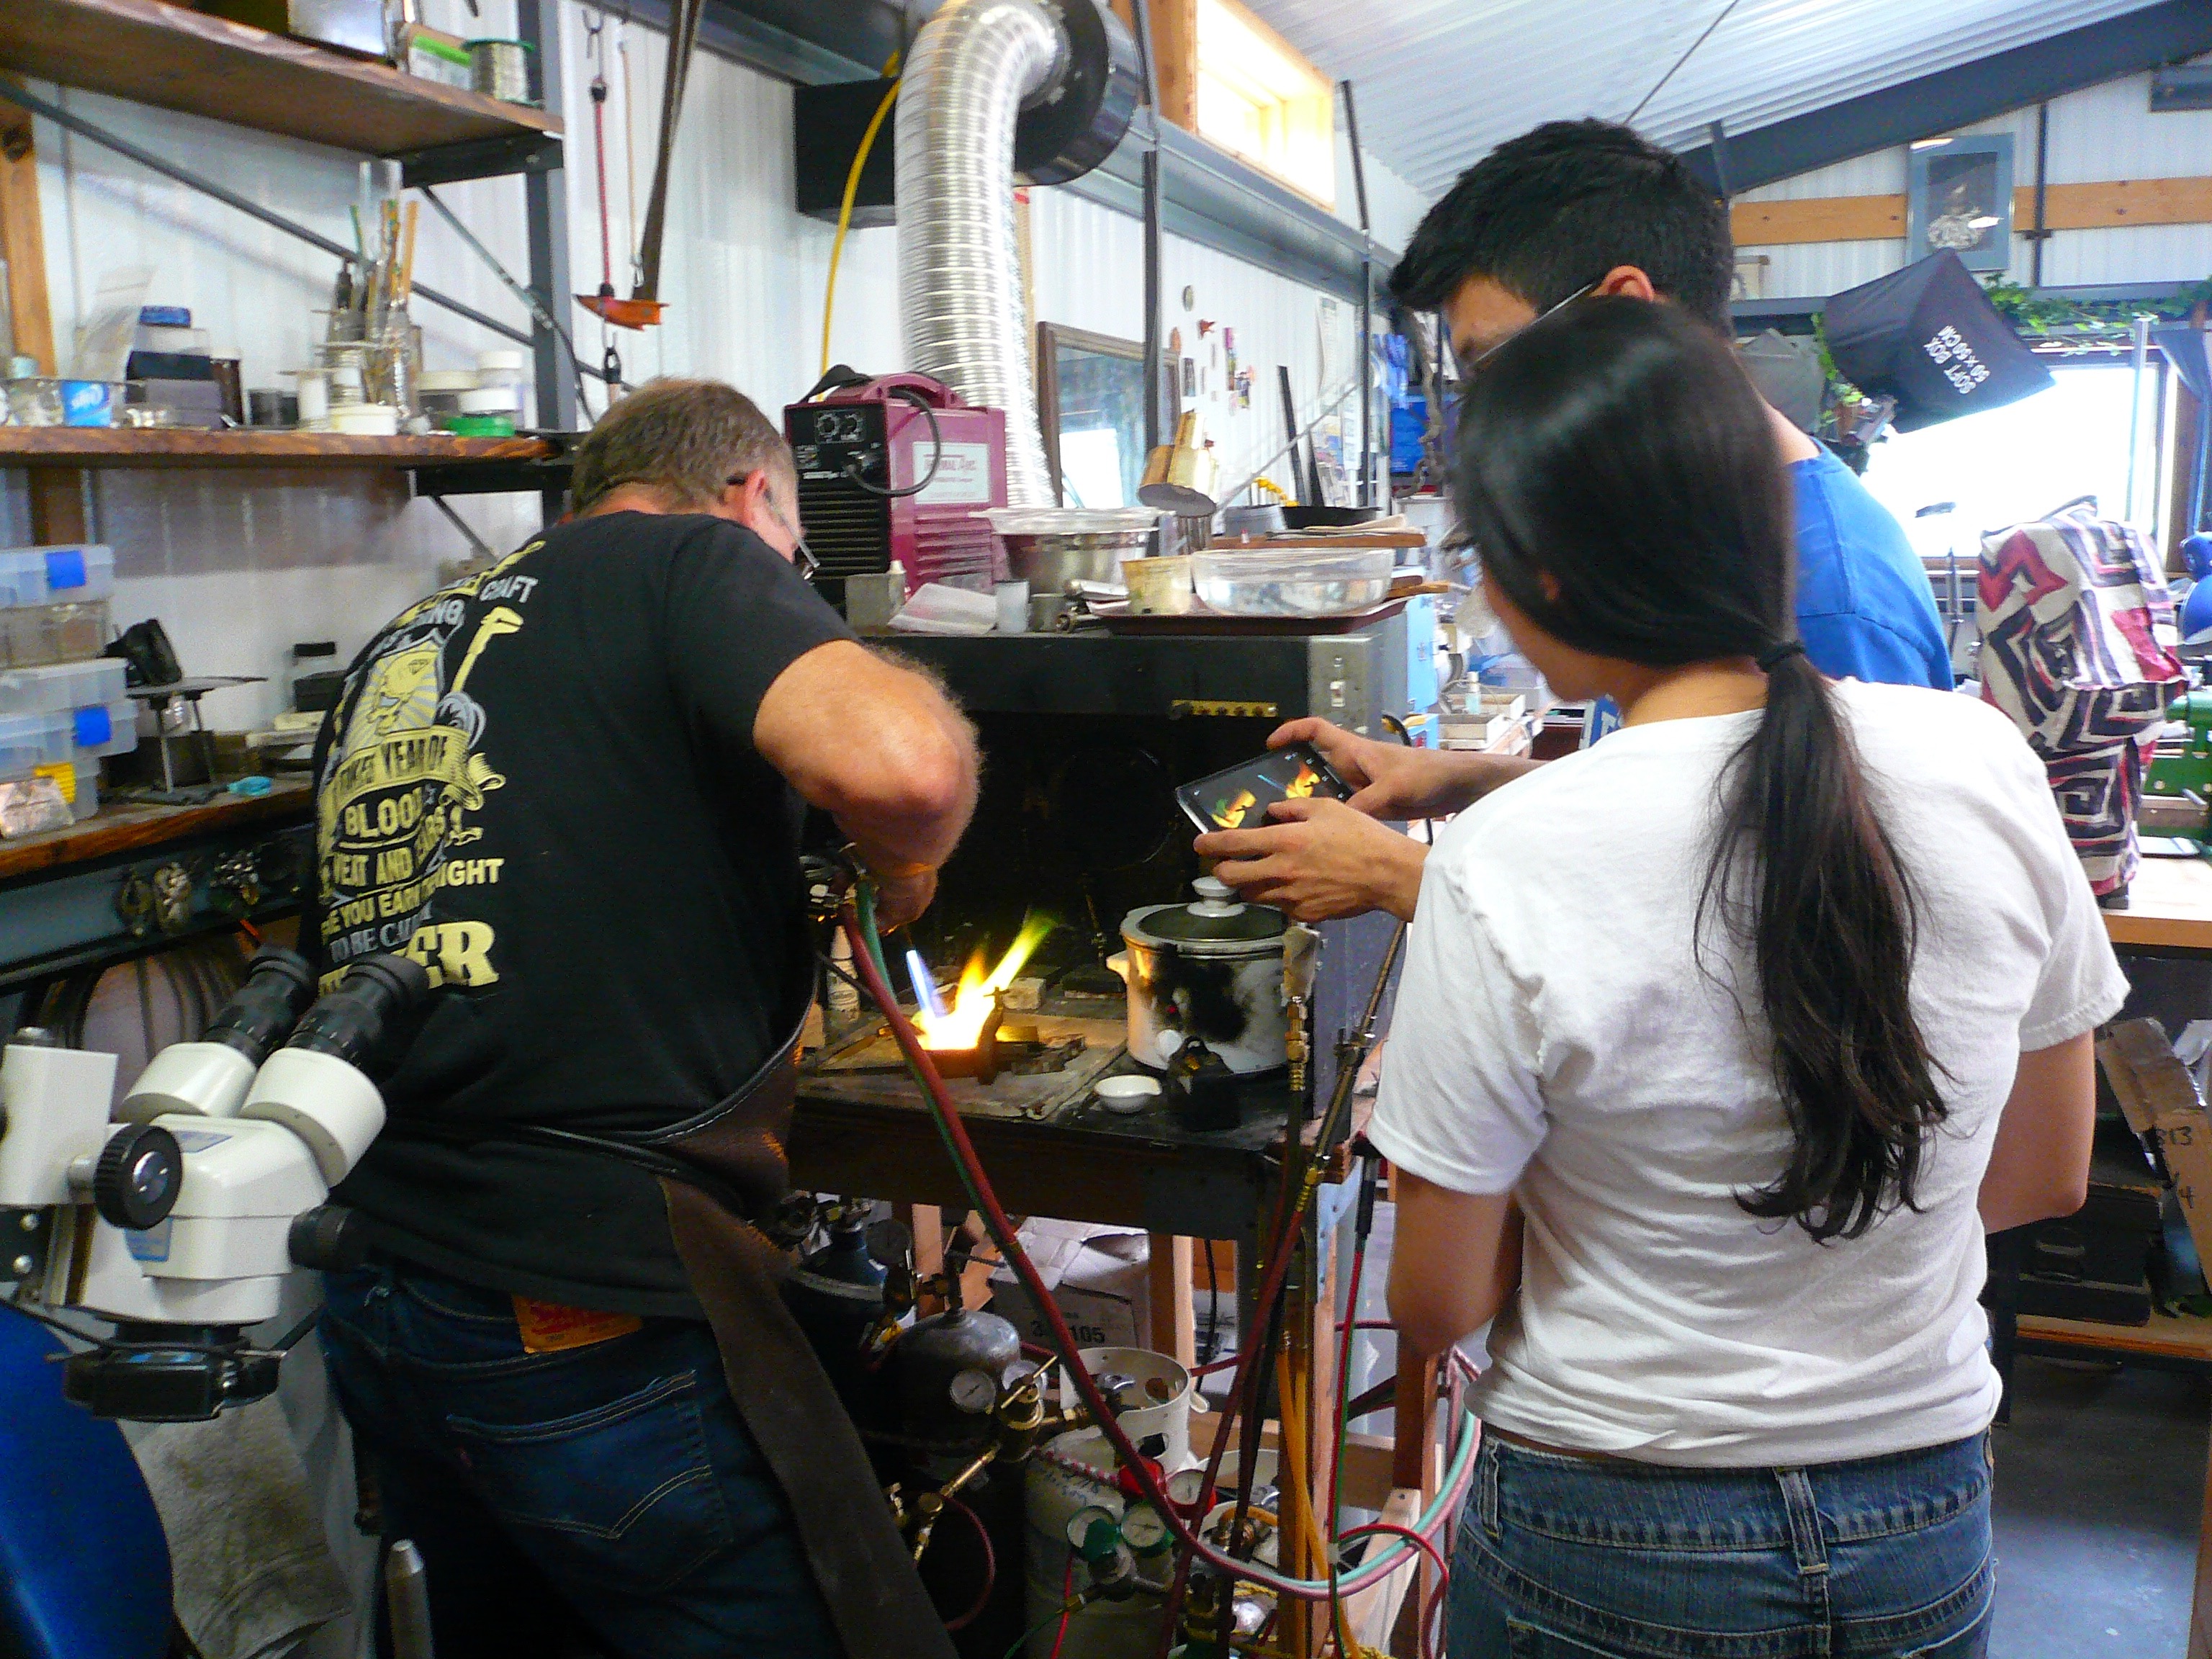
The next step was to break down the crystalline structure so it could be rolled and formed easier. First Joe and Jamie used hammers and (without smashing fingers) partially forged the ingot. Then we put the ingot in a 50 ton hydraulic press and further squeezed it. The next step was annealing the metal to make it soft again. This required heating it up to a dull red and quenching it in water, then sticking it in an acid solution to dissolve the flux residue. The next step was rolling it in the rolling mill. Finally, we had a rectangular wire we could work with.


The making of the rings really started to take shape. The metal was made, rolled to shape and then we calculated how much metal we needed for each ring blank. Once that was known Joe and Jamie cut the ring blanks and start to file and clean them up. Then we used some tooling in another 20 ton hydraulic press to bend the ring shanks around a mandrel. Once the rings were round and to size I soldered the seams together. Then the filing really started! Joe and Jamie went to work! Then they filed a comfort fit dome on the inside making sure the size stayed correct for the corresponding finger. The rings were really coming together. The red gold is very evident now compared to the 24K ingot. At this point I could see the joy and excitement in Joe and Jamie! We were all getting tired but the project was nearly there! We talked about what kind of surface texture they wanted. I showed them about 6 different textures and how they were applied to the metal, they picked a slightly matt texture. After a good polishing of the inside and texturing of the outside and placing an 18K stamp on the inside, the rings were done!
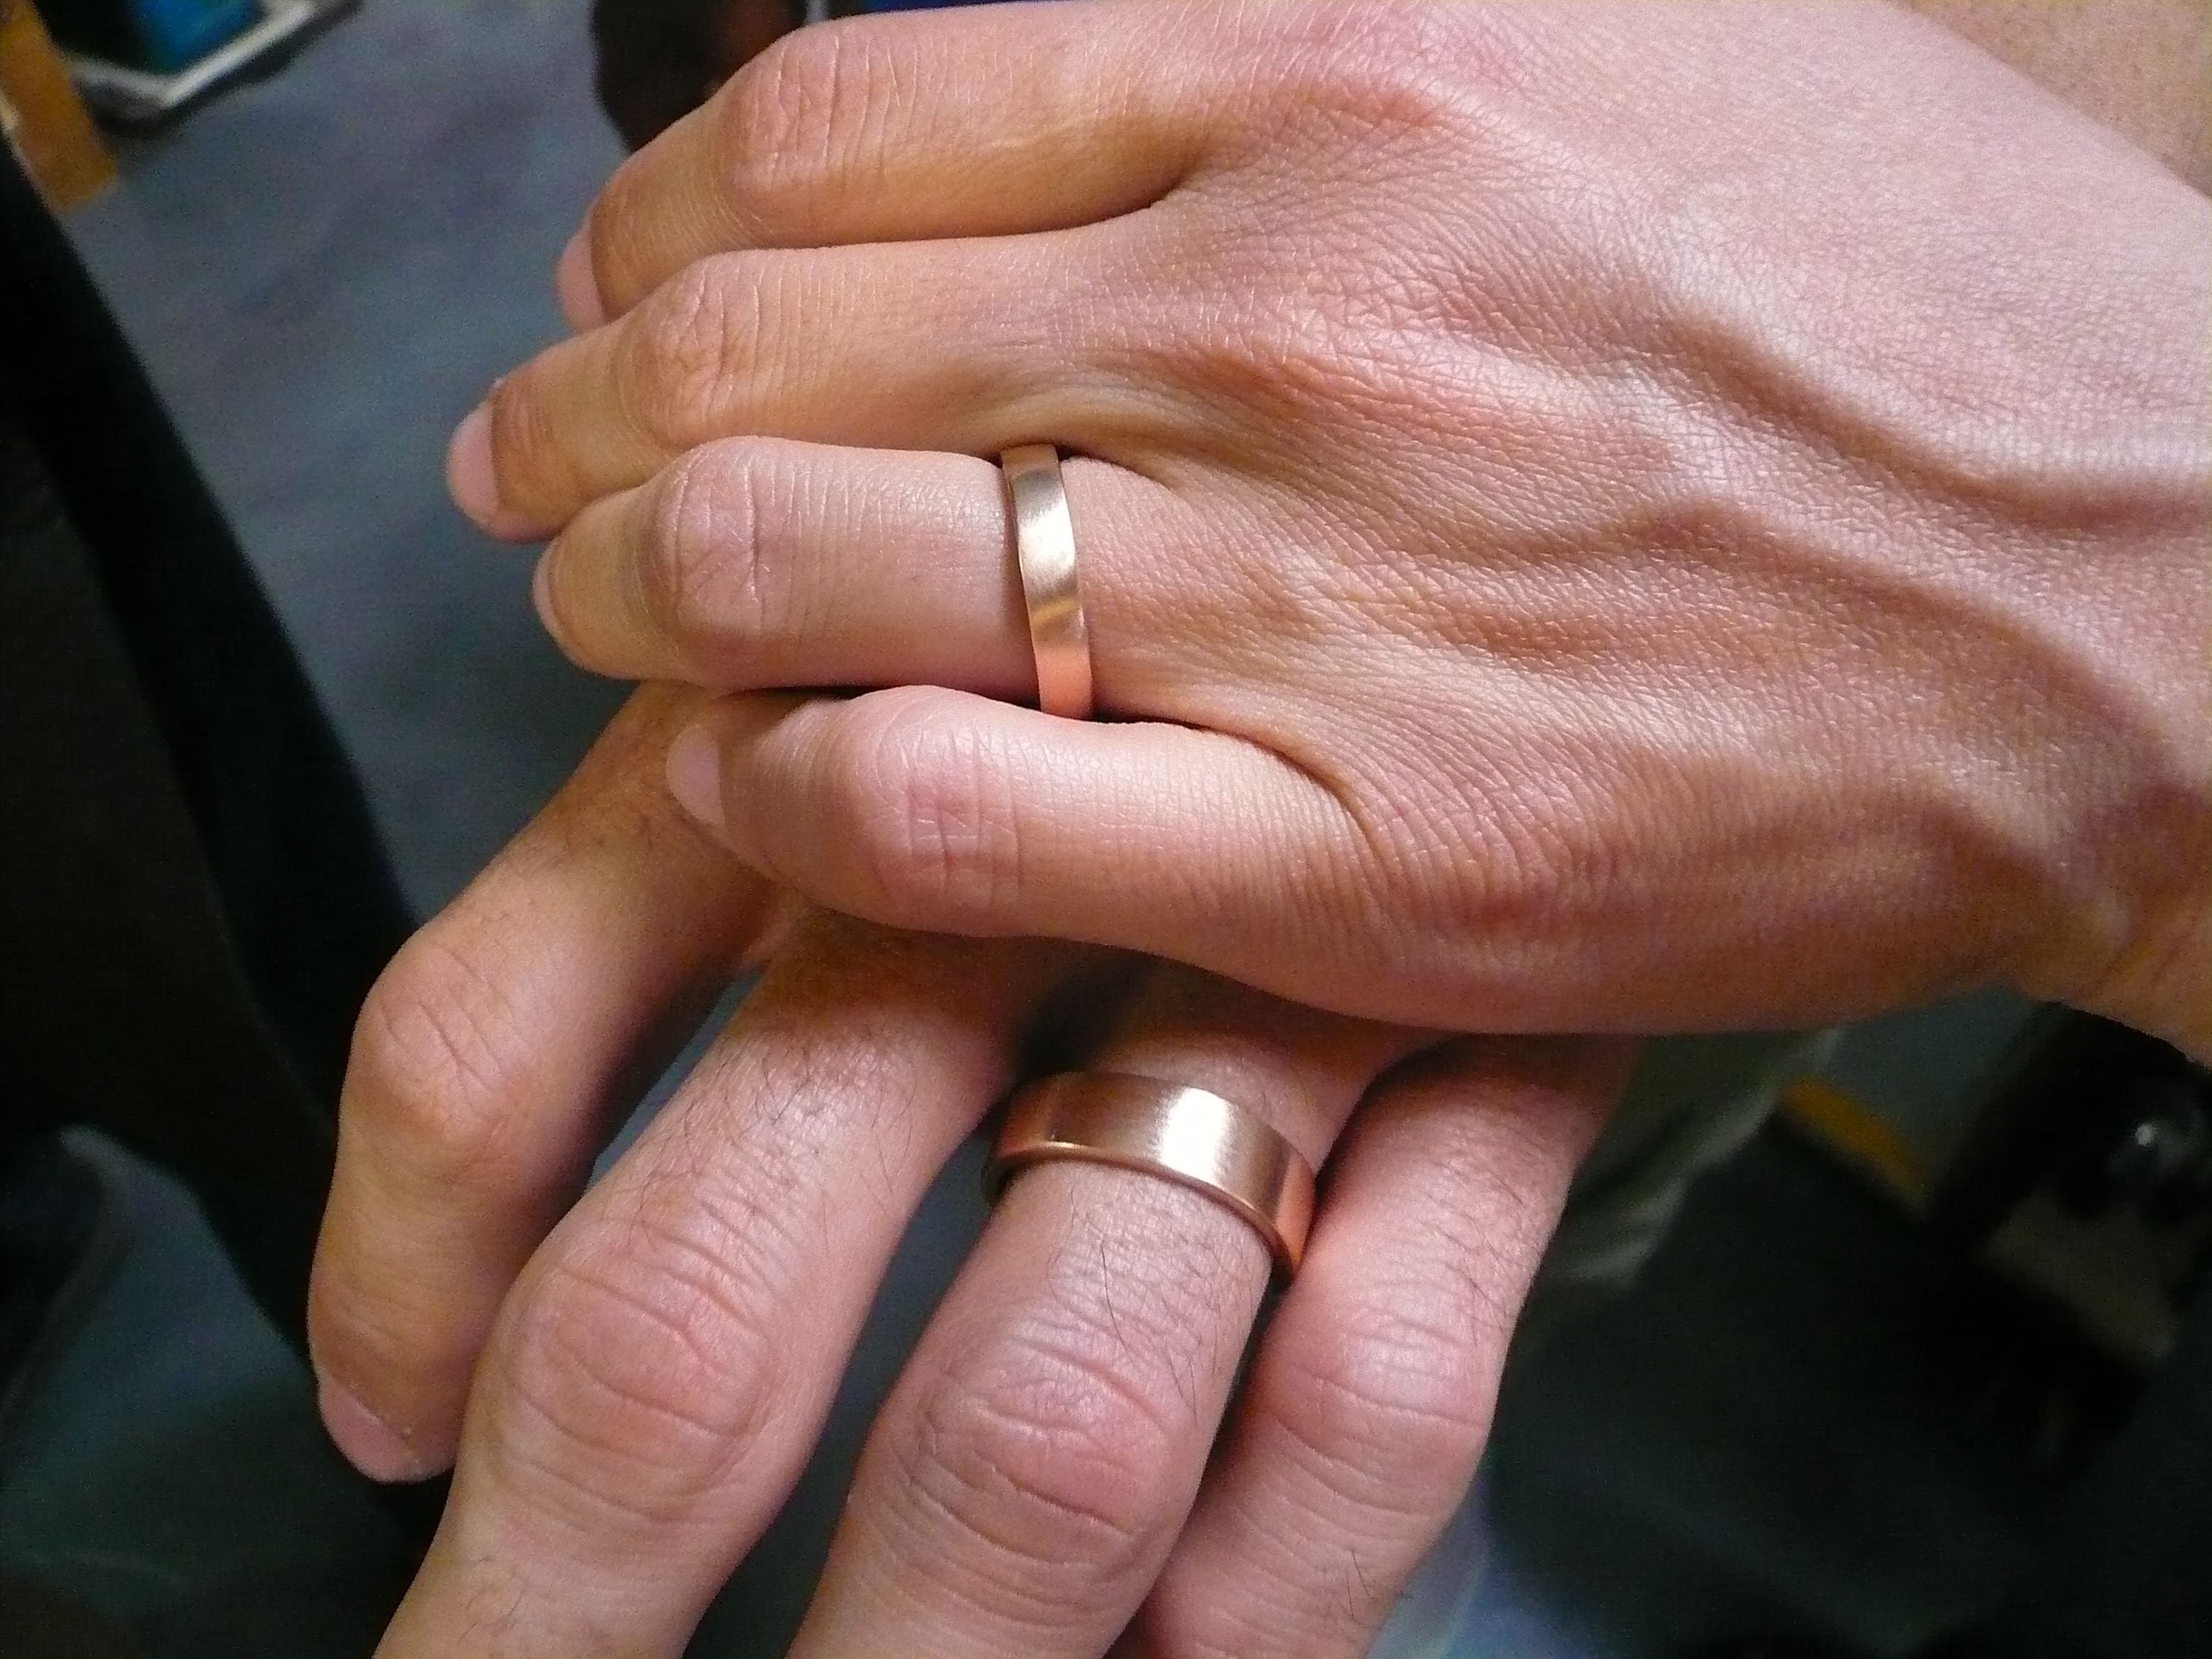
Old gold from the family, transformed with alchemy and sweat into something magical, became a true symbol of commitment and love.
Thank you Joe and Jamie! I had a great time and they walked away from the day with their very own set of commitment/wedding rings.